Webchat
Webchat Template
Setting up your template for webchat interactions
To effectively handle webchat interactions, you need to set up two important contexts in your template:
- Create Context: Handles the initial connection and creates a new stub for each conversation
- Default Context: Manages the ongoing conversation and processes user messages
Create Context Setup
The create context is responsible for receiving the first message from a webchat user and initializing a new conversation stub.
What is the Create Context Used For?
- In order to interact with end users through webchat, you need to have a stub that manages incoming traffic
- The create context specifies actions that handle the first message a user sends from webchat
- A stub will be created from the create context, and this stub will handle webchat events
Setup Options
You have two routing options for your webchat traffic:
Option 1: Stubref Routing (Recommended for Most Cases)
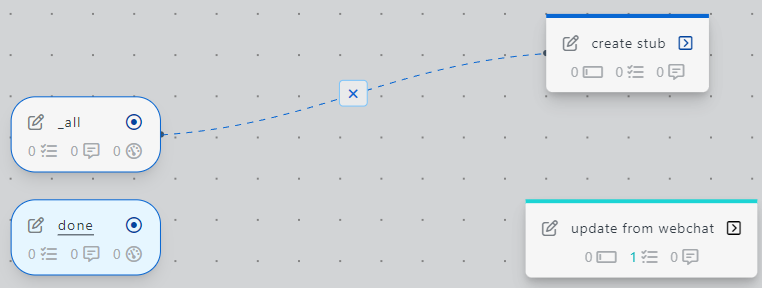
Navigate to the create context and open the canvas
Create an action called
_update_from_webchatYour canvas should look like this:
Configure Create Stub Task
In the
_update_from_webchataction, add the taskcreate_stub (with data)from the task library: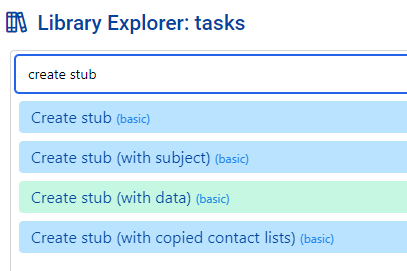
Configure with the following parameters:
Data from the webchat service is placed in
stub.data._incoming_webchat_data. To pass this data to the new stub, we configureparams.data._incoming_webchat_datato have the value~~stubpost.data._incoming_webchat_data.Test Your Webchat Client
You will see that a draft stub was automatically created for you
Open that stub and copy the stubref

In your
webchat profile, select thedraftbranch and enableSend webchat traffic to stub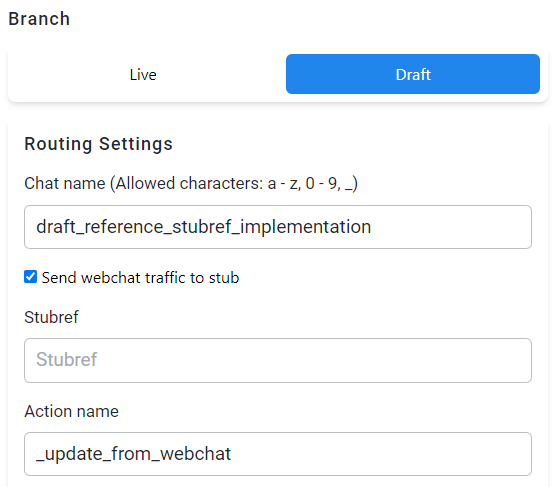
Paste your copied
stubrefinto the stubref field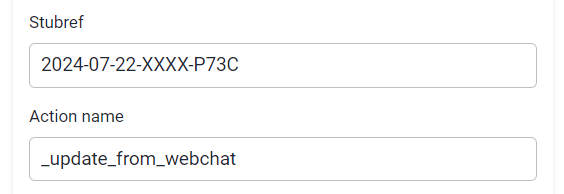
Open your webchat client and send a message
After sending a message, the webchat service will execute the
_update_from_webchataction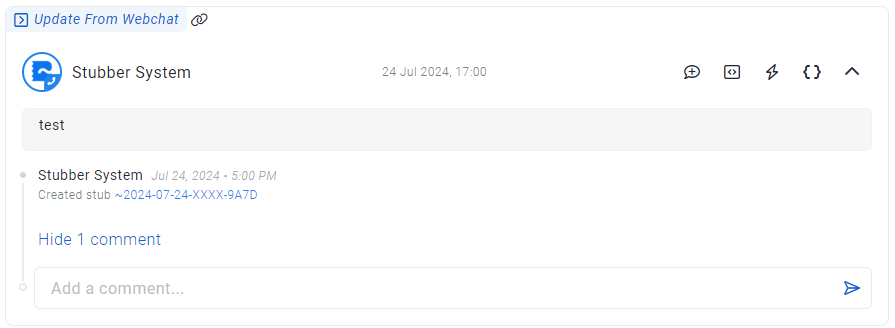
Option 2: Heimdall Routing (For Advanced Use Cases)
Navigate to the create context and create an action
register_heimdall_pathsYour canvas should look like this when complete:
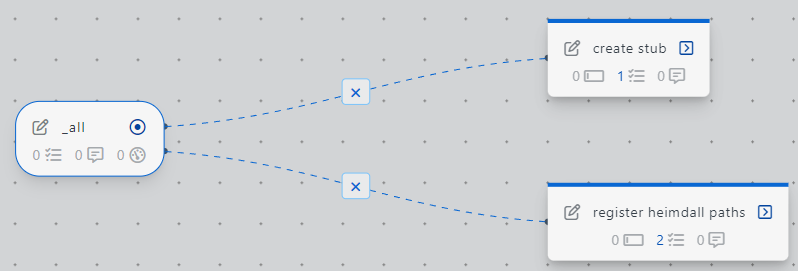
Configure Heimdall Register Task
In
register_heimdall_paths, add the taskheimdall_registerfrom the task library: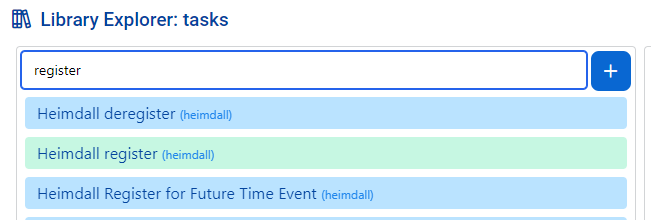
Configure with the following parameters:
Important: Replace
your_chat_namewith the Chat name from your webchat profile.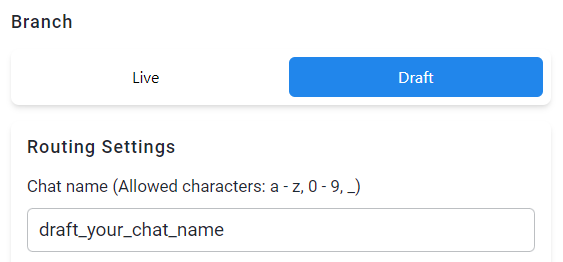
Configure Create_Stub Action
In
create_stub, add the taskcreate_stub (with data)from the task library:
Configure with the following parameters:
Data from heimdall events is placed in
stub.data.heimdall.webchat. We want to pass this data to the new stub as it contains thewebchat session uuidused to reply to a specific webchat instance.Test Your Webchat with Heimdall
Create a draft stub and run the action
register_heimdall_paths
Open your webchat client and send a message
After sending a message, heimdall will execute the
create_stubaction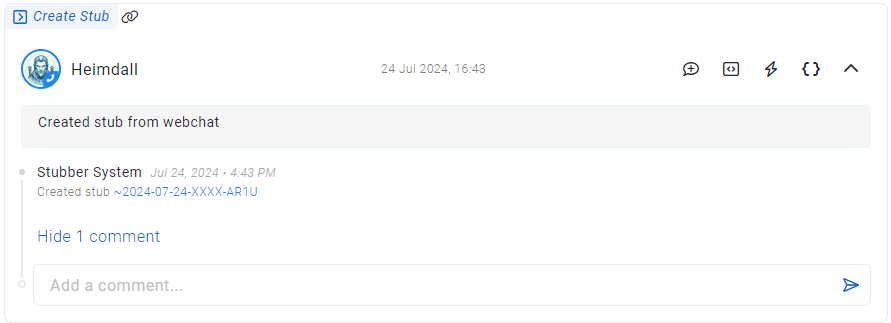
Default Context Setup
The default context handles the ongoing conversation after the initial connection is made.
What is the Default Context Used For?
- Handle interactions between the user and other systems in stubber
- React and respond to the user's incoming messages
- Create a
stubsessionbetween the new stub and the webchat session for ongoing communication
Setting Up the Default Context
Navigate to default context and click on
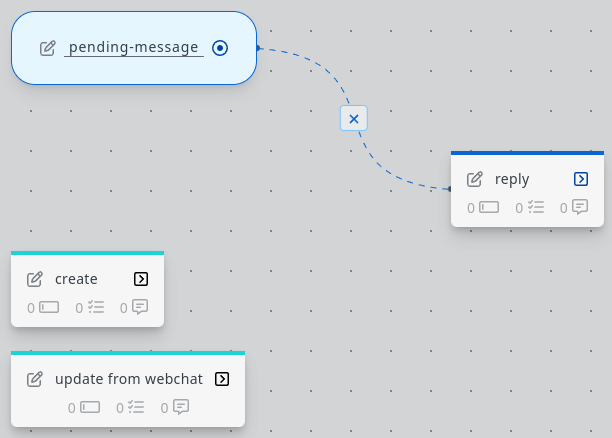
Edit FlowCreate Basic Flow Structure
- Create a state called
pending-message(This will be the state that the stub will be in when replying to messages) - Add an action called
reply(This action will send a message to the webchat client) - Add an action called
_create(This action runs when the stub is created) - Add an action called
_update_from_webchat(This action will be used to trigger a reply when a user sends a message)
- Create a state called
Configure the Reply Action
In the
replyaction, add theWebchat notification to sessionfrom the library and configure it as follows:Change
webchat.sessionuuidvalue to~~stub.data._incoming_webchat_data.sessionuuid. This will allow the notification to send a message to the correct client.Configure the _create Action
In the
_createaction, add the taskSend actionfrom the library and configure it as follows:This will trigger a reply when the new stub is created. Once the reply is sent, a stubsession will be created between the new stub and the webchat client, allowing all future messages to be routed into the
_update_from_webchataction.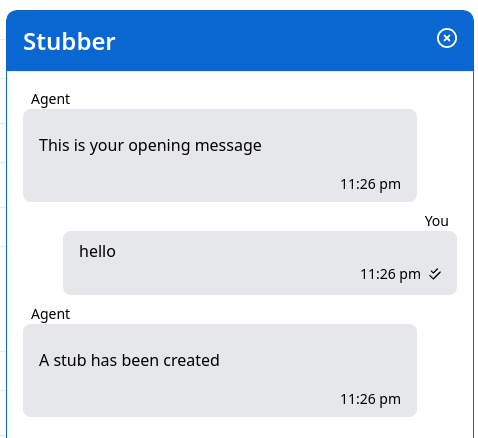
Configure the _update_from_webchat Action
To respond to future messages, add the task
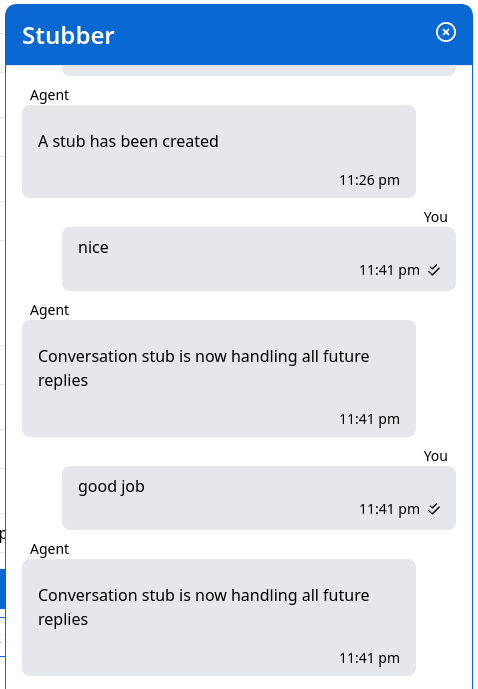
Send actionto_update_from_webchat:Now all future messages will be handled by the conversation stub:
Advanced Configuration
Once you have set up your basic webchat template, you can:
Add AI Integration
- Integrate with AI models to provide automated responses
- Create intelligent routing based on message content
Customize Message Formats
- Use different message types (text, markdown, cards)
- Include images and attachments in responses
Implement Business Logic
- Add form collection functionality
- Create conversational workflows
- Integrate with external systems through webhooks
Manage Conversation State
- Track conversation history and context
- Implement conversation timeouts and transfers