Webchat Template
Create Context
Explains Webchat create context setup for initial connections. Useful for starting new stubs or onboarding users from Webchat sessions.
The create context receives the first message from a webchat user and initializes a new conversation stub.
What is the Create Context Used For?
- Interacting with end users through webchat requires a stub that manages incoming traffic
- The create context specifies actions that handle the first message a user sends from webchat
- The create context creates a stub that handles webchat events
Setup Options
You have two routing options for your webchat traffic:
Option 1: Stubref Routing (Recommended for Most Cases)
Navigate to the create context and open the canvas
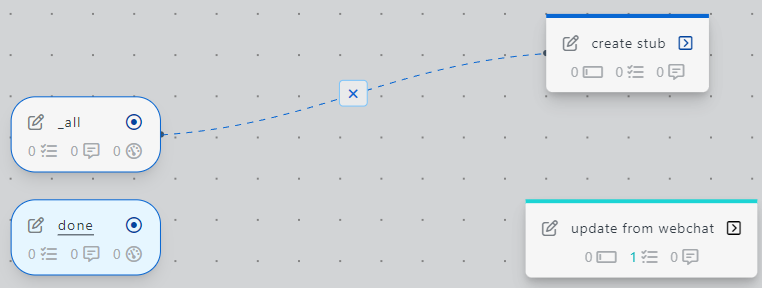
Create an action called
_update_from_webchatYour canvas should look like this:
Configure Create Stub Task
In the
_update_from_webchataction, add the taskcreate_stub (with data)from the task library:
Configure with the following parameters:
Data from the webchat service is placed in
stub.data._incoming_webchat_data. To pass it to the new stub, setparams.data._incoming_webchat_datato~~stubpost.data._incoming_webchat_data.Test Your Webchat Client
You will see that a draft stub was automatically created for you
Open that stub and copy the stubref

In your
webchat profile, select thedraftbranch and enableSend webchat traffic to stub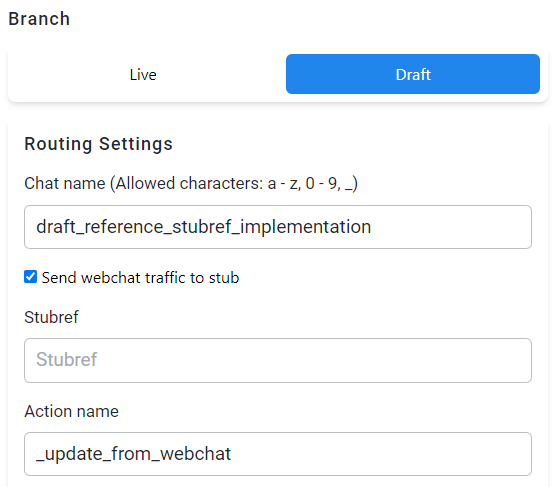
Paste your copied
stubrefinto the stubref field
Open your webchat client and send a message
The webchat service then executes the
_update_from_webchataction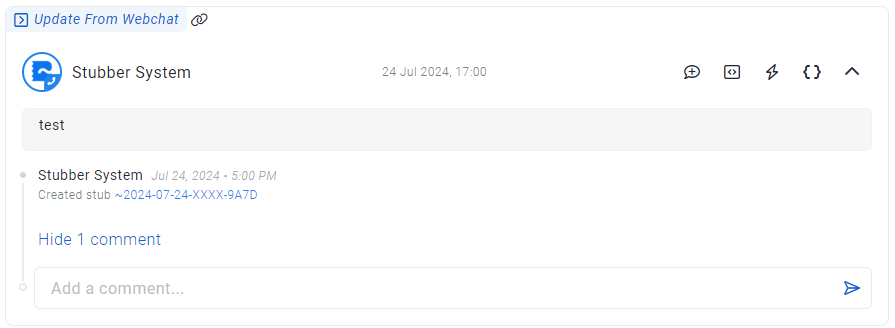
Option 2: Heimdall Routing (For Advanced Use Cases)
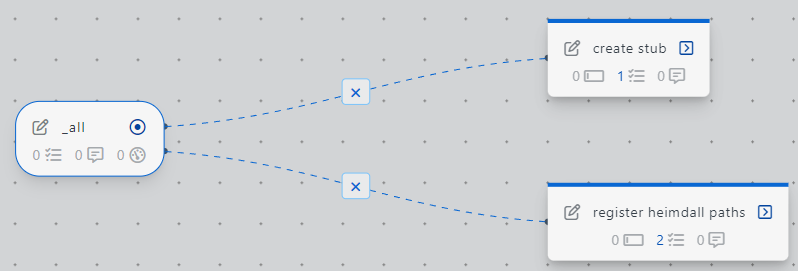
Navigate to the create context and create an action
register_heimdall_pathsYour canvas should look like this when complete:
Configure Heimdall Register Task
In
register_heimdall_paths, add the taskheimdall_registerfrom the task library: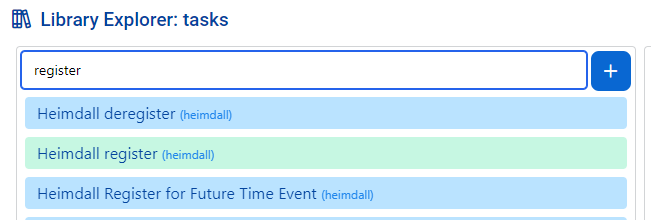
Configure with the following parameters:
Important: Replace
your_chat_namewith the Chat name from your webchat profile.
Configure Create_Stub Action
In
create_stub, add the taskcreate_stub (with data)from the task library:Configure with the following parameters:
Data from heimdall events is placed in
stub.data.heimdall.webchat. Pass it to the new stub; it contains thewebchat session uuidused to reply to a specific webchat instance.Test Your Webchat with Heimdall
Create a draft stub and run the action
register_heimdall_paths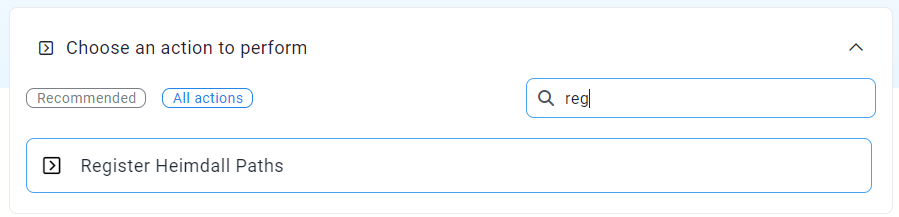
Open your webchat client and send a message
Heimdall then executes the
create_stubaction