Create Your First Template
Creating a template with AI
Learn how to create a template with Flow Pilot.
Stubber is designed to make it as easy as possible to create templates and build AI-powered applications.
One of the ways Stubber simplifies this process is through Flow Pilot, an AI assistant that can help you generate templates simply by describing your process in natural language.
This tutorial will guide you through the process of creating a template using Flow Pilot.
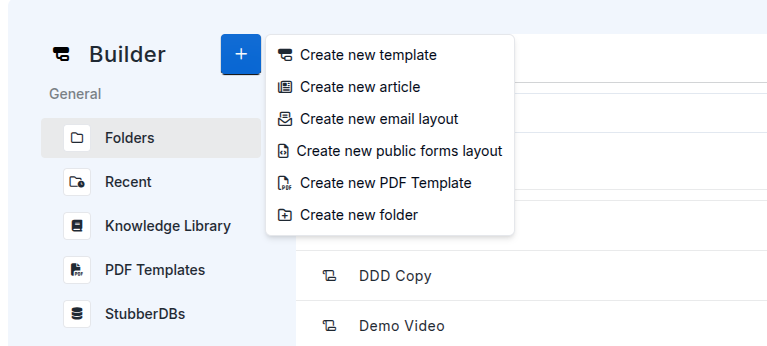
Step 1 - Create a new template
Open the Builder, click the add button, and select Create new template.
Step 2 - Describe your process
The Flow Pilot Prompt Input allows you to describe the process or workflow you want to build.

Using natural language, describe the process you want your template to handle. You can be as detailed as you like, but you do not need to define every single state, action, or transition manually. Flow Pilot will ask follow-up questions where necessary to clarify requirements and fill in missing details.
For example, let’s create a simple student registration flow for an online course.
I want to create a student registration flow for an online course.
The flow should start by asking for the student's name, email address, and phone number.
Then the student should select the course they want to register for.
After submission, the application should move into a pending approval state where an administrator can approve or reject the application.
Step 3 - Chat with Flow Pilot
Once you submit your prompt, you will be redirected to a dedicated Flow Pilot chat page.

Flow Pilot may ask follow-up questions to better understand your requirements and refine the template structure. Continue the conversation until the assistant has enough information to generate the flow.
Once Flow Pilot finishes generating the template, you can open it by clicking Edit Flow in the left toolbar.
Step 4 - Review and customize the generated template
When the template opens in the Builder canvas, you will see that Flow Pilot has automatically generated a flow based on the description you provided.
In this example, Flow Pilot generated the following registration flow:
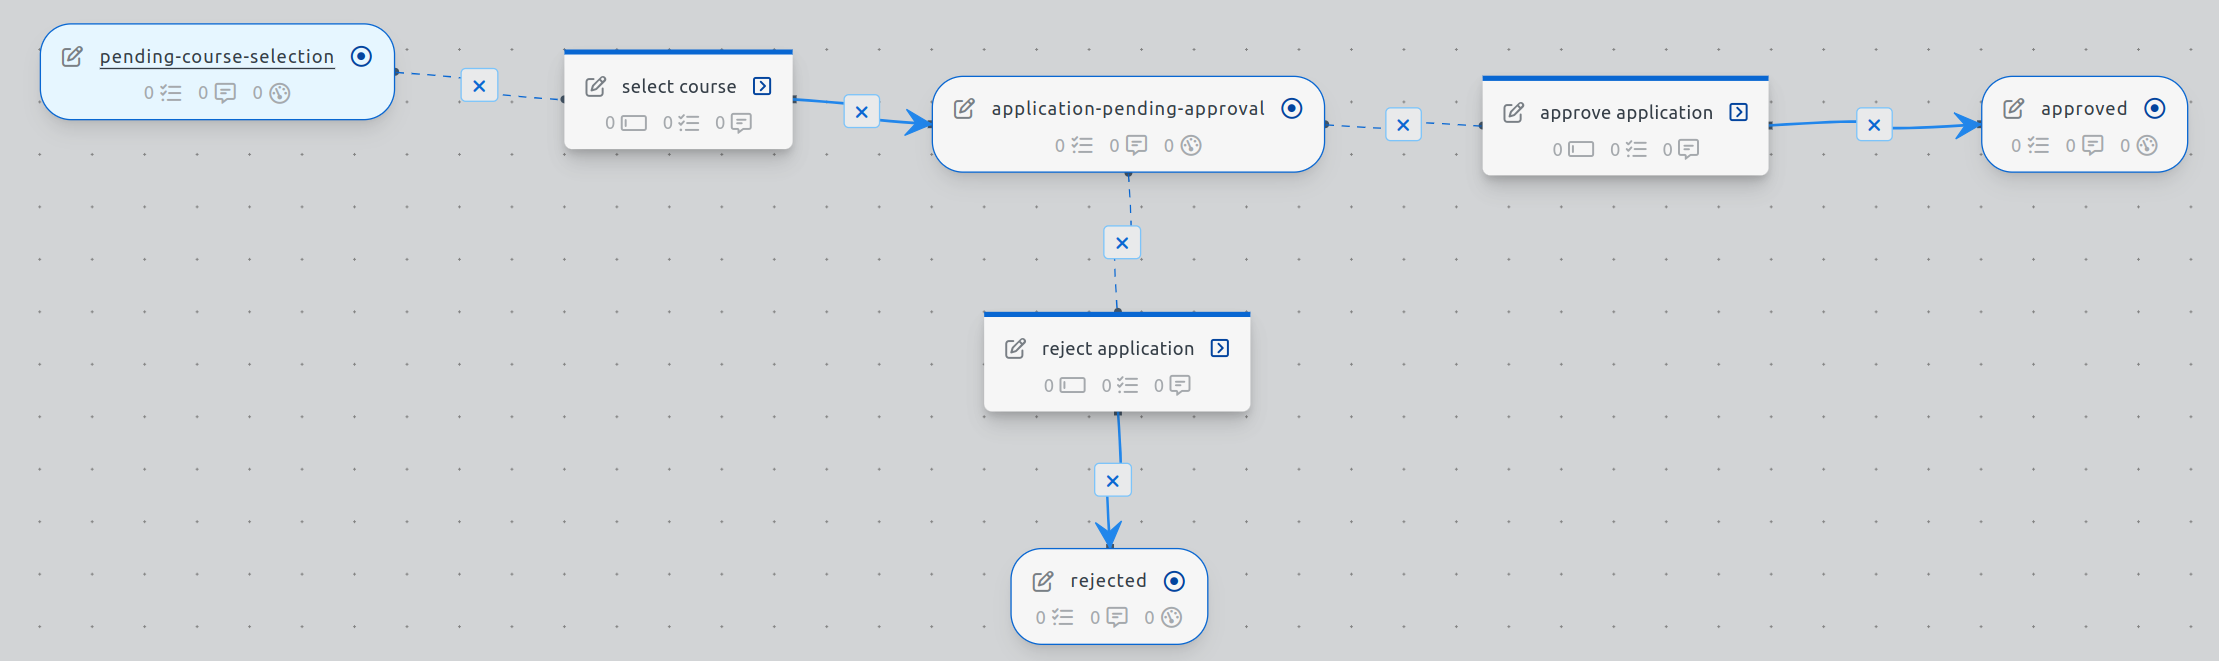
You can now edit and customize the template as needed by adding new states, modifying actions, updating prompts, or changing transitions.
You can also continue using Flow Pilot through the Flow Pilot Chat Widget located in the bottom-right corner of the canvas. This allows you to ask questions, request modifications, generate prompts, or make changes to the template while you continue building.
Step 5 - Generate a student number and send a confirmation email
Let us continue using Flow Pilot to enhance the template. Open the Flow Pilot Chat Widget and ask Flow Pilot to add a task that generates a unique student number for each student who registers, then sends a confirmation email that includes it.
For example, you can use the following prompt:
Add a task after the student registration is approved that generates a unique student number for the student.
Then send a confirmation email to the student's email address that includes their name, selected course, and student number.
Flow Pilot will update the template with the additional task and connect it to the existing registration flow.
Step 6 - Test the template
Once all the updates have been made, you can either test the template yourself by creating a new stub and running it. Or you can ask flow pilot to test it on you behalf, where it will create it's on stubs and run them to validate the flow works as expected.